
Why Mobile Services?
The Windows Azure platform makes a lot of sense as a back-end for mobile services, with its ability to easily scale and provide global presence. Up till now, building that back end has required developers to master multiple cloud services: you need Windows Azure Compute to host your web service, Windows Azure Storage or SQL Database to store data, Access Control Service for identity, and so on. Microsoft wanted to make it easier for mobile developers to more or less click a button and have an instant back-end. As you’ll see, they have indeed succeeded in pulling off that vision remarkably well.
This first incarnation of Mobile Services is designed for Windows 8 clients, with support for other mobile platforms to come in the future.
How to Access Mobile Services
Mobile Services is in preview, so you’ll first need to sign up for the preview at azure.com (navigate to ACCOUNT > preview features > Mobile Services).

Provisioning a Mobile Service in the Windows Azure PortalOnce you’ve been accepted for Mobile Services, you’ll notice a MOBILE SERVICES area now appears in the Windows Azure management portal. To provision a mobile service, click the New button at the bottom left and select MOBILE SERVICE.


Very quickly thereafter, your mobile service will be provisioned. You’ll see a confirmation message at bottom.
Your service will appear in the MOBILE SERVICES area of the portal. Click the mobile service to set it up.


As the wizard shows, there are three basic steps to setting up your service:
1. Download the Windows Azure Mobile Service SDK and Visual Studio 2012 Express
2. Create a database table
3. Download and run your app
Let's continue down the sample application path.
Step 1: Install the Mobile Services SDKYou need the Windows Azure Mobile Services SDK in order to use Windows Azure Mobile Services. You can download the mobile services SDK and, if you also need it, Visual Studio 2012 Express by clicking on the appropriate links.


Setting up a Database TableYou need at least one SQL Database table as backing storage for your service. If you’re just taking the tour, you can let the wizard generate a To Do Item table for your service.
In this step the wizard generates a Windows 8 app for you (!) which you can download, which is pre-configured to access your back end and is ready to run. You can choose a WinJS (HTML5/JavaScript) or C# (.NET/XAML) download. We'll choose WinJS here.


Download the zip file, copy its contents to a file folder, and open the .sln file in Visual Studio.

Open the default.js file and you’ll see in the onactivated event that a client object is created for mobile services that specifies an application key.

Running the Sample SolutionNow press F5 to run the sample solution you downloaded. You’ll see a screen like this, which lets you enter and view To Do tasks.

Enter some items, by entering a task name and clicking Save. As you do so, each item appears to the right. You can get rid of a task by checking its check box.

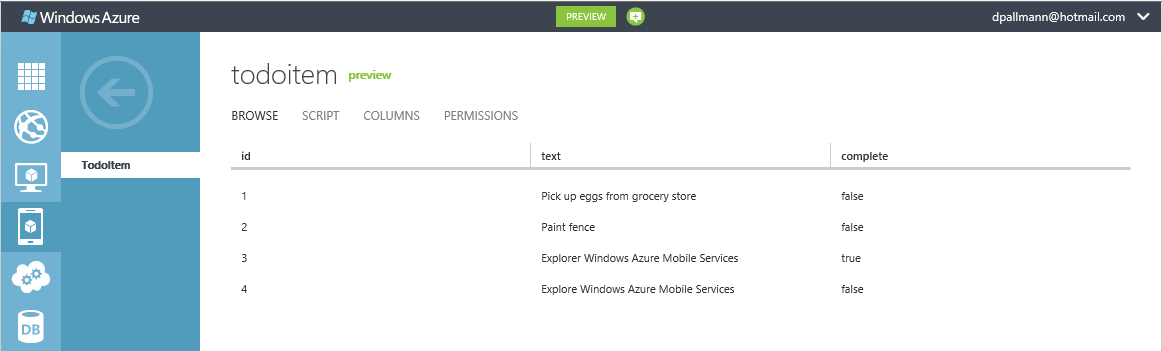
Viewing the DataWhere is the To Do data stored? In a Windows Azure SQL Database. You can view the database in the Windows Azure portal by navigating to MOBILE SERVICES > your project > DATA > your database. Here we see the items we just entered.
Scaling the Back EndSimilar to Windows Azure Web Sites, you can scale the back end in portal using the SCALE area of the project detail page. Just add more instances when you need them.

Wrapping it up: Windows Azure Mobile Services for Windows 8
At this point, you should be saying Wow! We've gotten a cloud-based back end (a collective set of cloud services) provisioned and ready for use unbelievably quickly and effortlessly.
We’ve just scratched the surface of what Windows Azure Mobile Services can do, but I hope this little tour gets across how easy and powerful it is and whets your appetite for exploring what the service can do for you. There’s plenty more functionality offered by Mobile Services, including authentication and push notifications. We’ll cover those and more in future posts.
4 comments:
Installation stops when the object system is other than Windows 8. Is there an SDK for Windows 7?
I believe you need to be on Windows 8 in order to use the SDK.
Hi David ,
What are the requirements of to do the windows Azure Mobile Service.
please see here : http://social.msdn.microsoft.com/Forums/pl-PL/windowsazuredevelopment/thread/38f630a8-eb59-4737-aa3f-2d84aab1377c
narashrajuu, if you watch the Day 2 BUILD conference keynote at http://buildwindows.com and see what Josh Twist is demonstrating you'll have have a good idea of what's involved.
Post a Comment