
To those diehard .NET developers who have been resisting .NET Core, let me give you some words of encouragement. You've no doubt been hearing more and more about .NET Core, and perhaps you haven't liked everything you've heard ("Config files are no longer XML?"). At this point, there's no denying that .NET Core has momentum: companies all over are making the switch. If you haven't learned .NET Core yet, you probably should: it's where Microsoft is now investing their development platform efforts, and the world is moving to it. On the plus side, there are some exciting new capabilities such as the cross-platform support we'll be focusing on in this post.
To illustrate a cross-platform .NET Core console command, we'll create an updated version of a command I wrote about last year named release. The purpose of the release command is to create and verify software release manifests in the form of directory files with hashes. Two files with the same content will have the same hash; even a one-character difference between two files will cause them to have wildly different hashes. The release command supports these actions:
release : displays help
release hash file : displays a hash code for a single file
release create manifest-file : creates a manifest file listing files and hash codes
release verify manifest-file : reads the manifest file and compares against the file system
Prerequisites
Our first step is to download and install the .NET Core SDK. At the time I'm writing this, the latest stable release of .NET Core is 2.2, so that's what we're using here.While optional, I'll also suggest you download Visual Studio Code. You can in fact use any editor / IDE you prefer, including traditional Visual Studio, but if your interest in .NET Core is cross-platform support then it makes sense to also use Visual Studio Code. With it and the .NET Core SDK, not only can you target non-Windows platforms; you can also do the development and building itself on any of those platforms.
Creating a Console Project with the Dotnet Command
To create our starter console project, we use the dotnet command. In .NET Core, you can do lots of things from the command line, including creating new projects from templates; building them; and running them. On Windows, open a command prompt as an Administrator and set your directory to a folder where you want to be doing .NET Core development.To create our console project, use the command dotnew new console -o project-name:
dotnet new console -o release

This generates a small number of files in a release folder. Program.cs is our started code, and release.csproj is our project file.
Create the Project Code
Open the Project in Visual Studio Code
Next, launch Visual Studio Code and open the folder we just created. If you're new to Visual Studio Code, you'll probably expext to be opening .csproj and .sln files, but it doesn't work that way in Visual Studio Code. Just open the release folder you created in the prior step, and trust that we'll be doing our building and running with the dotnet command.Write the Console Program Code
If you examine the generated Program.cs, you'll see it just outputs Hello World! to the console. We need to replace this with our desired code. In my case, we'll paste in the Program.cs source code from my original .NET Framework implementation.Our Program.cs in Visual Studio Code now looks like this:

We don't really need to do anything else: the original release command consisted of just Program.cs and didn't have any application configuration. We may need to make some changes later on when we test on other operating systems, but for now we can proceed as we are on Windows.
Build and Test the Project
Build the Project
Now we can build the project, for which we'll again be using the dotnet command. You can issue the build command from the command prompt as we did earlier, but for those new to Visual Studio Code you also have the option of using the integrated Terminal window in the editor. Just select Terminal > New Terminal from the menu, and you have a console window below your code.dotnet build
Execute the dotnet build command.

If you examine the release folder, you'll see there is a bin folder that contains a Debug folder that contains a netcoreapp2.2 folder. In /bin/Debug/netcoreapp2.2 we see a release.dll (not a .exe as you might expect), a release.pdb, and several json files.
The reason we don't see an .exe is that by default a .dll is generated, which you can execute using the dotnet command. Don't be worried: t is possible to generate an .exe, and we'll do so shortly.
Run the Project
Now that we have built our program we can try running it, using the dotnet run command. Once again you can issue this from a command prompt or a Visual Studio Code Terminal window.dotnet run

Our command appears to run. With no command line parameters, all release does is display help. We haven't done any real work yet but it's encouraging that our .NET Framework code has not needed any changes to work in .NET Core.
Now we can try the various actions available in the release command to test that they work.
We again use the dotnet run command to execute our command, but we can pass the same parameters we would give to release.exe.
dotnet run hash file
The hash file parameters tell the release command to display the hash code for the specified file. This works fine.

dotnet run create 0001.dir
Next we'll try the create manifest-file edition of the release command, which creates a release manifest file containing filenames and hash codes.

This again works as expected, generating the following ouput in manifest file 0001.dir:

dotnet verify 0001.dir
The last version of the release command we'll test is verify manifest-file, which reads a manifest and checks its hash codes against what it sees in the file systems, reporting any differences or missing files.

Once again, the command is working great.
Publishing to Windows
At this point, we've rather effortlessly imported our original .NET Framework code for the release command into .NET Core via Visual Studio Code, built it, and tested it.
We would now like to generate an actual .exe so that we can run this command on any Windows system without needing to use the dotnet run command. To do this, we use the dotnet publish command, specifying parameters targeting a particular environment—in this case, 64-bit Windows 10:
dotnet publish -r win10-x64
If we look in our /bin/Debug/netcoreapp2.2 folder, there is now a win10-x64 subfolder which contains our release.exe. If we copy the files in this folder (release.exe, all .dlls, all .json files) to c:\Windows\System32 or better yet to a folder contained in our PATH, we can now run the release command the way it was intended to be used from any Windows command prompt:

What we just did works, but involves a larger number of files than we would like. We can reduce the number of output files by creating a Self-Contained Deployment. We can generate an SCD by specifying the -c Release option to dotnet publish. This generates a smaller number of files in a Release/Win10-x64 folder.
dotnet publish -c Release -r win10-x64
Now that we've got our .NET Core console program working in Windows, it's time to publish it to additional platforms.
Publishing to Linux
With .NET Core, we can stay right where we are on our Windows machine and generate a Linux release.
To create a Linux executable, we will again use the dotnet publish command just as we did a moment ago, but with different parameters. The -r parameter targets the particular Linux distribution and version we have in mind. In this case, I'll target Ubuntu 18 64-bit because that's available for the AWS free tier:
dotnet publish -c Release --self-contained -r ubuntu.18.04-x64
This produces a set of files under bin/Release/netcoreapp2.2\ubuntu.18.04-x64
We can't test this without a Linux instance. I did the following to create an Ubuntu Linux instance on AWS and install .NET Core and my application:
1. Allocate a Linux instance on AWS. In my case, running Ubuntu 18.04,64-bit. Wait for it to initialize.
2. Connect to the instance from the AWS console via SSH. In my case, I used the PuTTY utility for Windows. Note that connecting from the AWS Console via PuTTY on Windows did not work until I made some permission changes on my .pem key file as per the instructions here.
3. On the Linux instance, in a browser, install the Dotnet Core Runtime. I did this by following the instructions here. Once completed verify the dotnet command works.

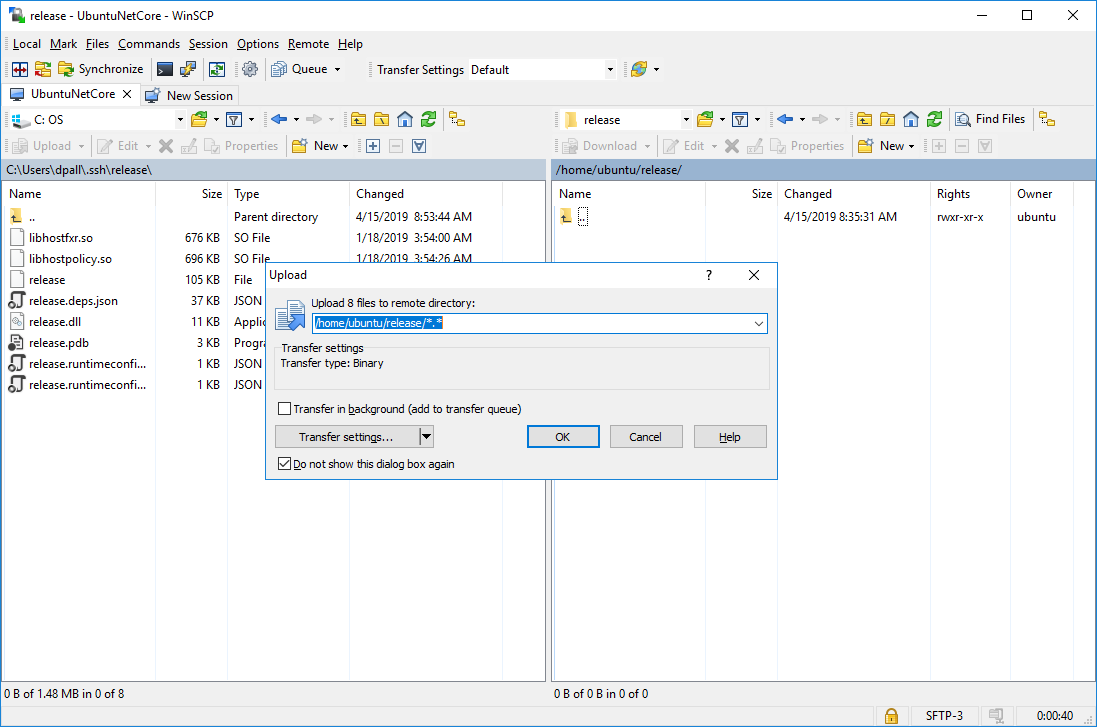
4. Copy the files in the publish folder (/bin/Release/netcoreapp2.2/ubuntu.18.04-x64/publish) generated by the dotnet publish command up to the Linux instance. If you're a Linux newbie, you might struggle mightily with transfer commands like SCP and PSCP (I certainly have). I like to use the WinSCP tool for file transfers, as described here.

5. On the Linux machine (via SSH or PuTTY), from the folder containing the publish files, you can now run the command with dotnet release.dll. At first glance, things seem to be working well—but we need to be exhaustive in our testing.
dotnet release.dll

dotnet release.dll hash mscorlib.dll

dotnet release.dll create 0001.dir

dotnet release.dll verify 001.dir
Here we ran into trouble: the verify operation thought every file in the manifest directory file did not match the local file system. A quick inspection of the code revealed why: it was written for Windows, and presumes that backslashes are used to separate folders in paths.
Well, that's easy enough to correct. We modified our code to support both backslash and forward-slash paths. Here's an example of one of the areas of code that had to be augmented:

With the above change in place, we again test—on both Windows as well as Linux—to confirm the release command is now fully working. It is! Below is a a run of the verify operation on Ubuntu Linux after posting an updated release where a few of the files have changed. The release command is working just as it supposed to, confirming 193 files checked and 2 files different.

Our release command now works on Linux!
Publishing to MacOS
We can publish to MacOS by specifying an OSX release. To deploy, I'll be borrowing my wife's Macbook Air which is running OSX 10.14; the publish command we need to use therefore is:
dotnet publish -c Release -r osx.10.14-x64
The steps to deploy our application on MacOS are:
1. Run the above dotnet publish command (adjusted for the version of MacOS you are targeting) to generate a publish folder for MacOS.
2. On the Mac, in a browser, visit http://dotnet.microsoft.com/download and download the .NET Core Runtime for MacOS. Open the download to install. Test it works by opening a Terminal window and entering dotnet.
3. Transfer your application files to the Mac. First copy the application files from your Windows PC OSX publish folder (in /bin/Release/netcoreapp2.2/osx.10.14-x64/publish) to a thumbdrive. Then plug the thumbdrive into the Mac. Create a new folder under Applications and copy the publish files there. For my application that folder is Applications/Release.

4. In a Terminal window, CD to the folder from Step 3 where the files were placed. Run the release command with dotnet release.dll followed by any command line arguments.
dotnet release.dll
The dotnet release.dll command (with no arguments) simply displays help, and tells us our program is intact and able to execute on MacOS:

dotnet release.dll create 0001.dir
The create manifest-file operation hashes files in the current working directory and any subfolders and created a manifest directory file with has codes.

cat 0001dir
Here's the manifest file that was created:

dotnet release.dll verify 0001.dir
Finally, here's the verify manifest-file operation, which reads the manifest file and verifies it against the file system.

Our release command now works on MacOS!
Post-Mortem: Cross-Platform Support for .NET Core
In this post, we've shown how .NET Core code can generate output that runs not only on Windows but also on Linux and MacOS. We ported a .NET Framework console program to .NET Core and proved it could run on all three operating systems.
Our initial development was on Windows, but needn't have been. Everything that was done on Windows in this article could just as easily been done on Linux or MacOS using the .NET Core SDK and Visual Studio Code.
We demonstrated Linux support by targeting Ubuntu Linux with the dotnet publish command. On AWS, I instantiated a Linux server. On the server we ran some terminal commands to install .NET Core Runtme, then copied our files from the Ubuntu publish folder to a folder on the Linux box. Adminittedly, this took several hours: I struggled with setting up ssh and trying to copy files with scp. There were lots of little gotchas, such as having to change permissions on the AWS .pem (key) file. Ultimately, the PuTTY and winscp tools made things easier for this longtime Windows developer. With the Linux-basics learning curve behind me, I'm confident my next time around deploying .NET Core apps to Linux will go much more rapidly.
As the console program we ported was a release utility that accesses the file system, we did need to make some changes—but only because the original code presumed Windows file pathing with backslashes. The modified code is far more useful because it can work across multiple operating systems. It only took about an hour to modify the code and test that the program still worked correctly on each OS.
To get up and running on the Mac, things went quite quickly. Rather than connecting remotly to an AWS VM, I had the Mac in front of me. I used a browser to download .NET Core Runtime, and a thumbdrive to transfer files using the Finder. In a Terminal window, testing the program on MacOS went smoothly and everything worked the very first time I tried it.
Conclusion
.NET has certainly come a long way from its debut in 2000. .NET Core does introduce some changes, not all of them pleasant, but the changes are there for good reasons. If you've been dragging your feet on .NET Core, I urge rethinking your position. .NET Core adoption is rampant. Microsoft is producing platforms like .NET Core and tools like Visual Studio Code in order to win over developers regardless of their preferred operating system, and it is working because they are very well done.
Being able to use .NET Core and C# for development yet target other operating systems is huge. Not only are many companies using .NET Core, many of them are using for non-Windows deployments: a clear sign of that, if you peruse job postings, is how many companies are advertising for .NET Core skills targeting deployment to Linux.
1 comment:
Nice work David!
Post a Comment