Showing posts with label Cloud Gourmet. Show all posts

Sunday, October 16, 2011

The Cloud Gourmet 30-Minute Meal: Simple Database Migration to SQL Azure

Bonjour and welcome again to The Cloud Gourmet with Chef Az-ure-D.

Today we have another “30 minute meal” recipe for Windows Azure. This time we will move a simple database into the cloud. For databases that meet our criteria, this is a “piece of cake”.

I must emphasize we are talking about simple databases: large or complex databases will certainly take more than 30 minutes; some take weeks! Below we are specific about the criteria for an easy migration.

Of course we often think of a database as just one tier of a complete solution, but this is not always the case. Sometimes a database on its own is a valued asset, such as reference data that many consume for different reasons. Even if you do need to migrate a complete solution, this recipe can be of use, because it is often the best approach to migrate the data first and then the application code.

To illustrate the steps of the migration, we will use the AdventureWorksLT database from Microsoft. If you wish to practice using the same data, you can obtain it here.


Recipe: Migrating a Simple SQL Server Database to SQL Azure in 30 Minutes

Databases on the Windows Azure platform are hosted by the SQL Azure Database service, available in sizes from 1-50GB at a cost of $9.99/GB/month plus bandwidth charges. SQL Azure is very similar to SQL Server and uses the same protocol (TDS) and programming model. You can work with SQL Azure databases using both the familiar SQL Server Management Studio tool (2008 R2 edition) and the SQL Azure section of the Windows Azure Management Portal.

Plan

An excellent tool for migrating SQL Server databases to SQL Azure is the SQL Azure Migration Wizard. We will use this tool to analyze, revise, and migrate the schema and data from an on-premise database to a cloud database. Nothing we will do will modify the source database in any way.

There are 5 steps we will perform:

1. Create a SQL Azure Database Server
2. Create a SQL Azure Database
3. Migrate the Database
4. Review SQL Azure Database in SSMS
5. Review SQL Azure Database in Portal

Databases come in all sizes and complexities. The majority of the world’s databases are small in size and simple in nature. Database products come in all sizes and complexities too. Check that you meet the criteria below before using this recipe.

Criteria

Migrations to SQL Azure are smoothest and fastest when the following are true:

SQL Server Database. Your starting point database should be in SQL Server or SQL Server Express, preferably a recent version like 2008 or 2008 R2. If this is not the case, you can expect a longer migration time and you may have to work through feature differences. If you are migrating from a different database product or a very old version of SQL Server, it is recommended you “stage” your migration by moving your database over to SQL Server 2008 R2 first, and then up into the cloud on SQL Azure.
Small Database. Database size matters in migrations for several reasons. First of all, there is an upper size limit for a SQL Azure Database (currently 50GB); if your database is larger, then you will need to partition into multiple databases. Second, large data takes a long time to transmit (days perhaps) and you are more likely to be encountering occasional communication failures during upload. If you measure your database size in megabytes, this 30-minute recipe is for you. If you are dealing with gigabytes of data, you can still use this recipe but expect to spend one or more days migrating and you may want to employ the services of an expert.
Simple Database. A simple database is one that is mostly about the data. Complex databases are those that depend on database server features which may extend the migration time or pose barriers to migration. Use of features like constraints, granular security, or stored procedures are often fine but can sometimes pose complications. Features like Windows authentication, SQL Agent jobs, replication, full text search, XML indexing, distributed transactions, and transparent data encryption are not available yet in SQL Azure.

Ingredients:

1  SQL Server database meeting the above criteria

You Will Need:

• A Windows Azure subscription
• The SQL Azure Migration Wizard.

Directions

Step 1: Create a SQL Azure Database Server

In this step you will create a SQL Azure database server using the Windows Azure management portal.

Note: if you have already created a SQL Azure database server, proceed to Step 2.

1A. In a large bowl.. .er, I mean In a web browser, go to the Windows Azure portal.

1B. Navigate to the Database category on the lower left.


1C. Select a subscription on the upper left.


1D. Click the Create button in the Server toolbar. A dialog appears.


1E. Specify the data center locale where you want to create your database server and click Next.


1F. Now specify a name you would like to use for an Administrator, along with a strong password. Record the administrator name and password for safekeeping. Again click Next.

Note: it’s possible to change the password in the future, but not the admin name.


1G. Finally, you will be prompted to set firewall rules. In order to access the database we will need to add a firewall rule.

  A. Check the Allow other Windows Azure services to access this server checkbox.
  B.Click Add.
  C. Enter a rule name.
  D. Enter a starting and ending IP address. You can either specify your own IP (shown in the dialog), or some other range. If you want to allow access for all, you can specify 0.0.0.0 through 255.255.255.255.
  E. Click OK and Finish to close the dialogs.


1H. A database server will soon appear in the main area of the Windows Azure portal. You will need to capture the server name, which is auto-generated and cryptic. In our example, it is b7e77waic7. Your name will be different.


So far we have created a database server (It is actually multiple servers, but this single virtual server name fits the SQL Server connection string model). The next step will be to create a database on that server.


Step 2: Create a SQL Azure Database

In this step you will create a database on the database server you created in Step 1.

2A. In the Windows Azure portal, select your database server.

2B. Click the Create button in the Database toolbar. A dialog appears.


2C. Specify (and record) a name for your database, and select an edition/size sufficient for your database. The Web edition offers 1/5GB sizes and the Business edition 10/20/30/40/50GB. Then click OK.


2D. Verify the database was created by finding it and selecting it in the outline at upper left. Notice that in addition to your database the database server also contains a master database.


Now that we have created our cloud database, we can begin the migration.


Step 3: Migrate the Database

In this step you will use the SQL Azure Migration Wizard to migrate your SQL Server database to the SQL Azure database created in Step 2.

3A. Launch the SQL Azure Migration Wizard and select the Analyze and Migrate / SQL Database option. Then click Next.


3B. In the Connect to Server dialog that appears, specify your source database server and authentication credentials as described below. Then click Connect.

Server name: Here you must specify server-name or server-name\instance-name. If you are running full SQL Server on your local machine and using the default SQL Server instance, just leave the setting to its default of localhost. If you are running SQL Server Express on your local machine, you are most likely using the .\SQLEXPRESS instance.
Authentication: Your source database may be set up for Windows authentication or SQL authentication. Select the appropriate option. For SQL authentication, also enter your username and password credentials.
Database. Leave this at its default value of Master DB. This will cause the databases to be listed for you on the next screen.


3C. On the next screen (Select Source), select your database and click Next.


3D. On the Choose Objects dialog, leave the default of Script all database objects and click Next.


3E. On the Script Wizard Summary dialog, make no changes and click Next. When prompted Ready to generate SQL script?, click Yes.


3F. When the Results Summary dialog appears, review the report content fully to see if there are any problems. You may also use the Save button to save a copy of the report.

In the case of the AdventureworksLT sample database we are using to illustrate this recipe, there is a problem noted in the report for the ProductionDescriptionsSchemaCollection table: XML Schema Collections are currently not supported in SQL Azure. This means our source database is using an unsupported feature in this one table. In our case we are unconcerned and decide to proceed without that one table. If you encounter errors, you will need to evaluate how serious they are and what action you should take about them. Note that it is possible in Step 3D earlier to specify which database objects are and are not included in the migration.


3G. If you have chosen after reading the report to proceed with the migration, click Next. A Connect to Server dialog appears. Otherwise click Exit and you will need to work on resolving your issues.

3H. Specify the information below to connect to the SQL Azure database you created earlier in Steps 1 and 2. Then click Next.

Server name: Specify the server name in the form SERVER.database.windows.net where SERVER is the generated database server name from Step 1H (b7e77waic7 in our example).
Authentication: Specify Use a specific user ID and password
User name: Specify an administrator username in the form USERNAME@SERVER where the administrator user name is the administration name you made up in Step 1F and the server name is the generated database server name from Step 1H (chefazured@b7e77waic7 in our example).
Password: Specify the administrator password from Step 1F.
Database: Select the Specify Database option and specify the name of the database you created in Step 2C (adventureworks in our example).


3I. On the Setup Target Server Connection dialog, confirm the database name is correct and click Next. When prompted to Execute script against destination server?, click Yes.


3J. Now sit back as the database is migrated. The running report will show you what is happening, including errors and remedial actions. Just how long this takes depends on the size of your database and the quality of your Internet connection.


3K. When the processing completed, you’ll see Processing finished on the bottom of the report. Review the report and decide if you think the migration was successful. You can save this report with the Save button if you wish. Then click Exit.


The last thing to do is confirm the database migration was successful. You can do this with SQL Server Management Studio (Step 4) or the Windows Azure Portal (Step 5).


Step 4: Review SQL Azure Database in SSMS (Optional)

In this step you will confirm your database was successful migrated to the cloud by accessing it with SQL Server Management Studio. You need the 2008 R2 edition of SSMS for this.

4A. Launch SQL Server Management Studio. The Connect to Server dialog appears.

4B. In the Connect to Server dialog, specify the connection information below:

Server name: the generated server name from Step 1H.
Authentication: SQL Server Authentication.
Login: The login name from Step 1F.
Password: the password from Step 1F.
Remember password: check if you don’t want to have to re-enter this info.
Options / Connect to Database: click the Options button and enter the database name from Step 2C under Connect to Database.


4C.Click Connect to connect to the database. If it fails, check the following:

• Did you create your database server?
• Did you create your database?
• Are you specifying the correct database server name in the right format?
• Are you specifying the correct admin username and password?
• Did you specify the database name on the Connection Properties tab?
• Are there any extraneous leading or trailing spaces in what you entered?
• Does your firewall prevent port 4133 (which SSMS required).

4D. Now inspect your database, start by expanding the SSMS outline at left and ensuring the tables you expect to be present are there.


4E. Perform some SELECT queries to ensure the data looks right. Do tables contain the number of rows you expect? Does table data look like you expect?


Step 5: Review SQL Azure Database in Portal (Optional)

This step is optional. If you would also like to see your data in the SQL Azure Portal, or if you were unable to use SSMS in Step 4, follow these steps:

5A. In the Windows Azure Management Portal, return to the Database area where you were working in Steps 1 and 2.

5B. Select your database on the outline and left and click the Manage button in the Database toolbar.


5C. In the sign-in dialog, specify the administrator username and password from Step 1F. Then click Log on.


5D. Click Tables at left and the database tables will be listed. Confirm the tables you expect are all there.


5E. Select a table you want to view. Click the Data icon to view its data, or the Design icon to view its design.


Concluding Remarks

Congratulations, you were magnificent! Vous avez été magnifiques! I am very proud of you.

I very much hope that your migration went well. If you ran into complications, if the souffle did not rise, do not depair. You must appreciate that not all database migrations are simple affairs. For help you can make avail of the excellent online guidance, support forums, community blogging, and perhaps consider obtaining help from an experienced consultant.

Saturday, October 8, 2011

The Cloud Gourmet 30-Minute Meal: Static Web Site Migration to Windows Azure


Bonjour and welcome again to The Cloud Gourmet with your host, Chef Az-ure-D.
My friends, today I would like to share with you the first of several “30 minute meal” recipes for Windows Azure or as you might put it, “low-hanging fruit”. In cooking, not everything must be a masterpiece that requires a great effort. So it is in the cloud: a great many useful things can be done easily and in a short period of time. We are not talking about “fast food” here, which I detest, but simple meals that are nutritious and satisfying that also happen to be quick and easy.


Perhaps some of you reading this have been considering Windows Azure for some time but have been afraid to, shall we say, take the plunge? I have the perfect remedy. Create one of these 30 minute meals and see for yourself how satisfying Windows Azure is. Doing so will give you confidence and something to show your colleagues. In no time you will be on your way to more ambitious projects.

Recipe: Migrating Static Web Sites to Windows Azure in 30 Minutes
Web sites come in all sizes and complexities. We have in mind here static web sites, in which we are serving up content but there is no server-side authentication, logic, database, web services, or dynamic page creation. If this is indeed the case, then your needs are simple: you need something to serve up HTML/CSS/JavaScript files along with media content (images, video, audio) or downloadable content such as documents or zip files. Here’s a step-by-step recipe for migrating your static web site to Windows Azure in 30 minutes.

I just happen to have one of these made already that I can pull out of the oven and show you: http://azuredesignpatterns.com. Note that even though the site is static that doesn’t mean it has to be limited in terms of visuals or interactivity. You can use everything at your disposal on the client side including HTML5, CSS, and JavaScript. This site in fact, static though it is, works on PC browsers as well as touch devices like tablets and phones.


Plan
The standard way to host a web site in Windows Azure is to use the Compute service and a web role. However, that’s overkill and an unnecessary expense for a static web site. An alternative is to use blob storage. This works because blob storage is similar to file storage, and blobs can be served up publicly over the Internet if you arrange for the proper permissions. In essence, the Windows Azure Blob Service becomes your web server.  I personally use this approach quite often and it works well.

Ingredients:

1  web site consisting of n files to be served up (may be flat or in a folder hierarchy).

You Will Need:
·     A Windows Azure subscription
·     A cloud storage tool to work with Windows Azure blob storage such as Cloud Storage Studio or Azure Storage Explorer. We’ll use Azure Storage Explorer in our screen captures. 

Directions
Step 1: Create a Windows Azure Storage Account

In this step you will create a Windows Azure Storage account (you can also use an existing storage account if you prefer).
1A. In a web browser, go to the Windows Azure portal

1B. Navigate to the Hosted Service, Storage Accounts & CDN category on the lower left.


1C. Navigate to the Storage Accounts area on the upper left.


1D. Click the New Storage Account toolbar button. A dialog appears.
Note: if you want to use an existing storage account instead of creating a new one, advance to Step 1G.


1E. Specify a unique name for the storage account, select a region, and click OK. We’re using the name mystaticwebsite1 here, you will need to use a different name.


1F. The storage account will soon appears in the portal. Wait for it to show a status of Created, which sometimes takes a few minutes.

1G. Ensure the storage account is selected in the portal, then click the View Access Keys toolbar button. Record one of the keys (which you will need later) and then click Close.


Step 2: Create a Container
In this step you will create a container in blob storage to hold your files. A container is similar to a file folder. We use will use a cloud storage tool for this step.

2A. Launch your preferred cloud storage tool.

2B. Open the storage account in your tool. You will need to supply the storage account name (Step 1E) and a storage key (Step 1G).


2C. Use your cloud storage tool to create a new container.  Be sure to specify both name and container access level in the dialog.

  · Name: Give the container any name you like, such as web.
  · Access Control: Specify public blob access.


Step 3: Upload Files
In this step you will upload your static web files to the container you created in Step 2 using your cloud storage tool.

3A. In your cloud storage tool, select the container and click the toolbar button to upload blobs. A file open dialog will appear.

3B. Navigate to the folder where your static web files reside, select the files to upload and click Open.

3C. Wait for your files to upload and appear in the cloud storage tool.

3D. Check the Name (Uri) and ContentType property of each file you uploaded and revise them if necessary:

· Name: If you uploaded from your root web folder, no changes are needed. If you uploaded from a subfolder (such as /Images), you must rename blobs to have the “folder/” prefix in their name. For example, if you uploaded logo.jpg from an images subfolder, rename the blob from “logo.jpg” to “images/logo.jpg”.
· ContentType: The content type must be set or a web browser will be unsure what to do with the file. The content type may have automatically been set properly based on the file you uploaded and the tool you are using. If not, manually set it. The table below shows some common web file types and the proper ContentType value that should be specified.

File Type
Content Type
.htm, .html
text/html
.css
text/css
.js
application/javascript
.bmp
Image/bmp
.gif
image/gif
.jpg, .jpeg
image/jpg
.png
image/png
.mp3
audio/mp3
.wav
audio/wave
.ogg
audio/x-ogg
.mpeg
video/mpeg
pdf
application/pdf
.zip
application/zip

Be sure to check and correct the name and content type of each file you have uploaded.


3E. If you have subfolders of web content, repeat steps 3A-3D for each subfolder.

Step 4: Test Navigation

In this you will confirm your ability to access the site.
4A. Find the root index file of your web site and compute its URL as follows (the cloud storage tool you are using may be able to do this for you):

http://<storageaccountname>.core.blob.windows.net/<containername>/<indexfilename>

In the example we have been showing, the URL is:
http://mystaticwebsite1.core.blob.windows.net/web/index.html

4B. Visit your web URL in a browser. The site should come up, and should be fully navigable. Voila!

If the site is not accessible or is partially accessible with content missing, double check you have correctly performed the previous steps. Here’s a checklist:

· Did you create your storage account?
· Are the storage account name and key you have been using the correct ones?
· Did you create your container with a public access level?
· Is the container name you are using the correct one?
· Did you upload all of your web files to the container?
· Is the index file name you are using the correct one?
· Did you rename blobs from subfolders to have the folder prefix in their names?
· Did you verify the blobs have the correct content type?

Concluding Remarks
Congratulations, I knew you could do it! I have never been prouder.

It’s beyond the scope of this recipe, but be aware that if you wanted to have a prettier domain name you can map a custom domain to your container or forward a custom domain to your container/root-index-file.

Although running your static web site out of blob storage is quite inexpensive, you should remember to delete the blobs when you no longer need them; otherwise you’ll be charged for the storage and bandwidth used month after month.
What we’ve done here is quite different from how you would host a complex or dynamic web site using the Compute service; I hope it has served its purpose to get something of yours up in the cloud in a short period of time—and that it spurs you on to something more ambitious.

Next: Cloud Gourmet #3 - 30-Minute Meal: Migrating a Simple Database

The Cloud Gourmet: Cooking with Windows Azure


Bonjour and welcome to The Cloud Gourmet with your host, Chef Az-ure-D. Together we shall create delicious masterpieces in the cloud on the Windows Azure platform.

In this first post I want to share some of my favorite resources for cooking in the cloud. in subsequent posts we will explore individual recipes.

Now you may be thinking "chef, that's fine for you but I cannot cook!" Nonsense! Absurdité! Anyone can learn to cook in the cloud, and many items are simple to prepares. Together we shall learn. You will see.


Recipes

Of course we learn by doing, but sometimes you just need to get something accomplished and need guidance to ensure a successful outcome. That's why we have recipes. Let me share some of my favorite recipe sources with you.

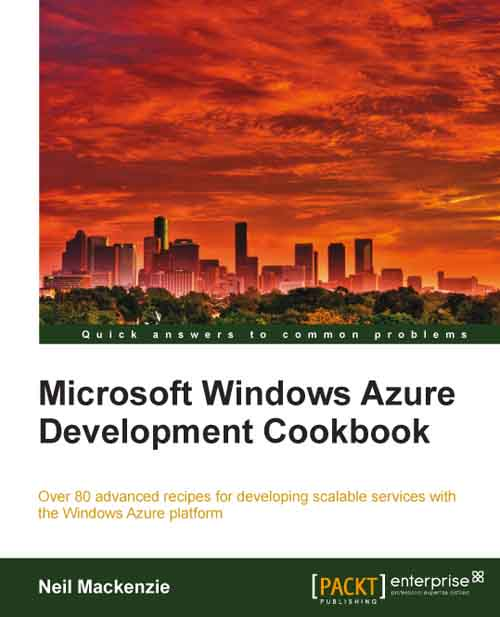
Windows Azure Development Cookbook
Neil Mackenzie
http://www.packtpub.com/microsoft-windows-azure-development-cookbook/book


Neil Mackenzie (@mknz) is not only a Windows Azure MVP and respected blogger, he’s also the Julia Child of Windows Azure. His Microsoft Windows Azure Development Cookbook is just what it claims to be, a cookbook (available in print and Kindle editions). Neil’s cookbook is a step-by-step guide to accomplishing key development tasks on the Windows Azure platform with sample code all along the way. It includes chapters on access, blob storage, table storage, queue storage, hosted services, diagnostics, management, SQL Azure database, and AppFabric service.

Windows Azure How To Topics
Microsoft Documentation
http://msdn.microsoft.com/en-us/library/windowsazure/gg432998.aspx


There’s a lot of good information in the Windows Azure online documentation, and one of the best parts of that are the Windows Azure How To Topics pages and index. As you can see from this partial screen capture it covers a lot of tasks. Each how to page gives you the approach and steps to follow and shows sample code.

Windows Azure Training Kit
Microsoft
http://www.microsoft.com/windowsazure/learn/get-started/


The Windows Azure Training Kit contains a nice collection of hands-on labs. With the investment of an hour or two, each lab shows you step-by-step how to build something that leverages one or more of the services in the Windows Azure platform.


Shows

There’s nothing like a cooking show to get inspired: an expert shares insights, shows you how something is done, and then pulls a finished version out of the oven to show you the outcome.

The Cloud Cover Show
Steve Marx and Wade Wegner, Microsoft Channel 9
http://channel9.msdn.com/Shows/Cloud+Cover


Cloud Cover is your eye on the Microsoft Cloud. This weekly videocast by Microsoft evangelists Steve Marx (@smarx) and Wade Wegner (@WadeWegner) is excellent, educational, and entertaining. In each show they’ll take an area of Windows Azure and show it you close up as well as discussing its significance. Cloud Cover is also one of best ways to keep up with news about Windows Azure.

Session Videos from Microsoft Conferences


Microsoft puts on several large conferences each year including PDC, MIX, TechEd, and BUILD. The videos of the keynotes and technical sessions are usually kept online for a year on Microsoft Channel 9. In these you can hear from Microsoft product team members and developer evangelists.


Live Demonstrations

An in-person cooking demonstration is a real treat—especially if you get to cook alongside. These kind of events exist for Windows Azure. Keep an eye out for upcoming events in your area.

Windows Azure Bootcamps
http://azurebootcamp.com

From time to time, Microsoft and the MVP community will put on Windows Azure bootcamps which are usually 1- or 2-day free events. Here, you’ll hear topical presentations and be guided through hands-on labs with assistance. These events are also a great opportunity to talk directly to an expert.

Code Camps


Regional code camps are another great way to see live Windows Azure presentation and development. Windows Azure is often a topic covered at these events.


The Personal Touch

On-site Training


You get what you pay for, no? Perhaps you want more than the occasional free regional event and want on-site training, which can be tailored to your needs, people, location, and schedule. Windows Azure training is offered by some Microsoft patterns including Neudesic. Think of on-site Windows Azure training for architects, developers, and IT professionals as the equivalent of sending your people to a culinary institute.

Consulting

There’s nothing like a personal chef, eh? If you retain the services of a knowledgeable and experienceD consultant you are in good hands. You can leverage a consultant in a number of ways: they can advise you, help with design, and/or perform the actual development work. You can use consultants to create your solutions for you, or even better you can cook alongside them so you learn. These days they can work on location and/or remote, with on-shore and/or off-shore resources as desired. Windows Azure consulting is offered by some Microsoft partners including we at Neudesic.

My friends, this is by no means all. The Microsoft and community resources for Windows Azure are substantial. Once you have a feel for who in the community is working in areas that interest you, I urge you to follow their blogs and social network posts. I look forward to cooking in the cloud with you!

Next: Cloud Gourmet #2 - 30-Minute Meal: Migrating a Static Web Site